MFA Setup Guide: Smartphones and Tablets
Enrolling your account for multifactor authentication is quick and easy! After you've enrolled in MFA, you will be able to approve sign-ins to CSU resources by responding to a push notification with a code displayed on your screen. You'll only be prompted for MFA when accessing CSU resources off-campus. If you are transferring from one device to another, please follow the instructions to manage your multifactor authentication methods.
Before you begin, we highly recommend beginning the enrollment process on a desktop or laptop with your smartphone or tablet ready.
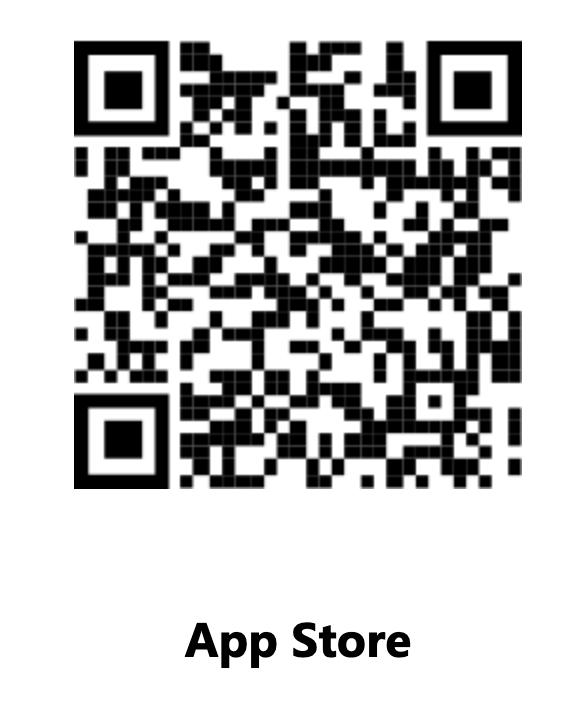
- Scan the appropriate QR code from your smartphone or tablet to install the Microsoft authenticator app.
Having trouble? Search for Microsoft Authenticator directly in the App or Play store, or click here for Android or here for iPhone/iPad.Android iOS 
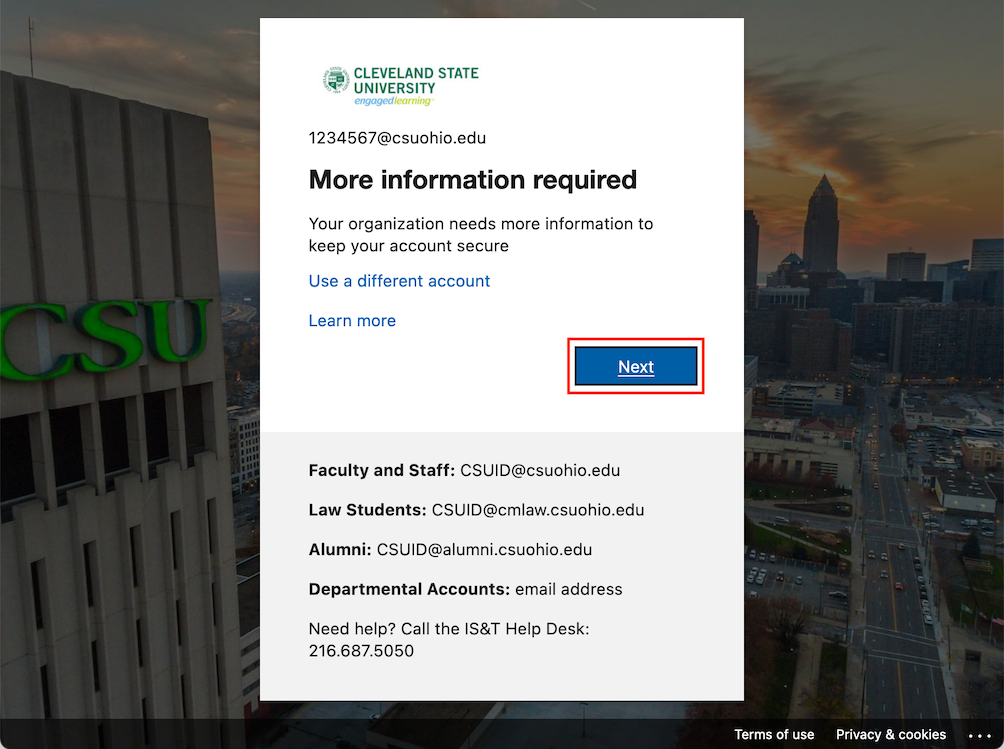
- Once Microsoft Authenticator has been installed, head to http://mfasetup.csuohio.edu on your computer to begin. Click Next:
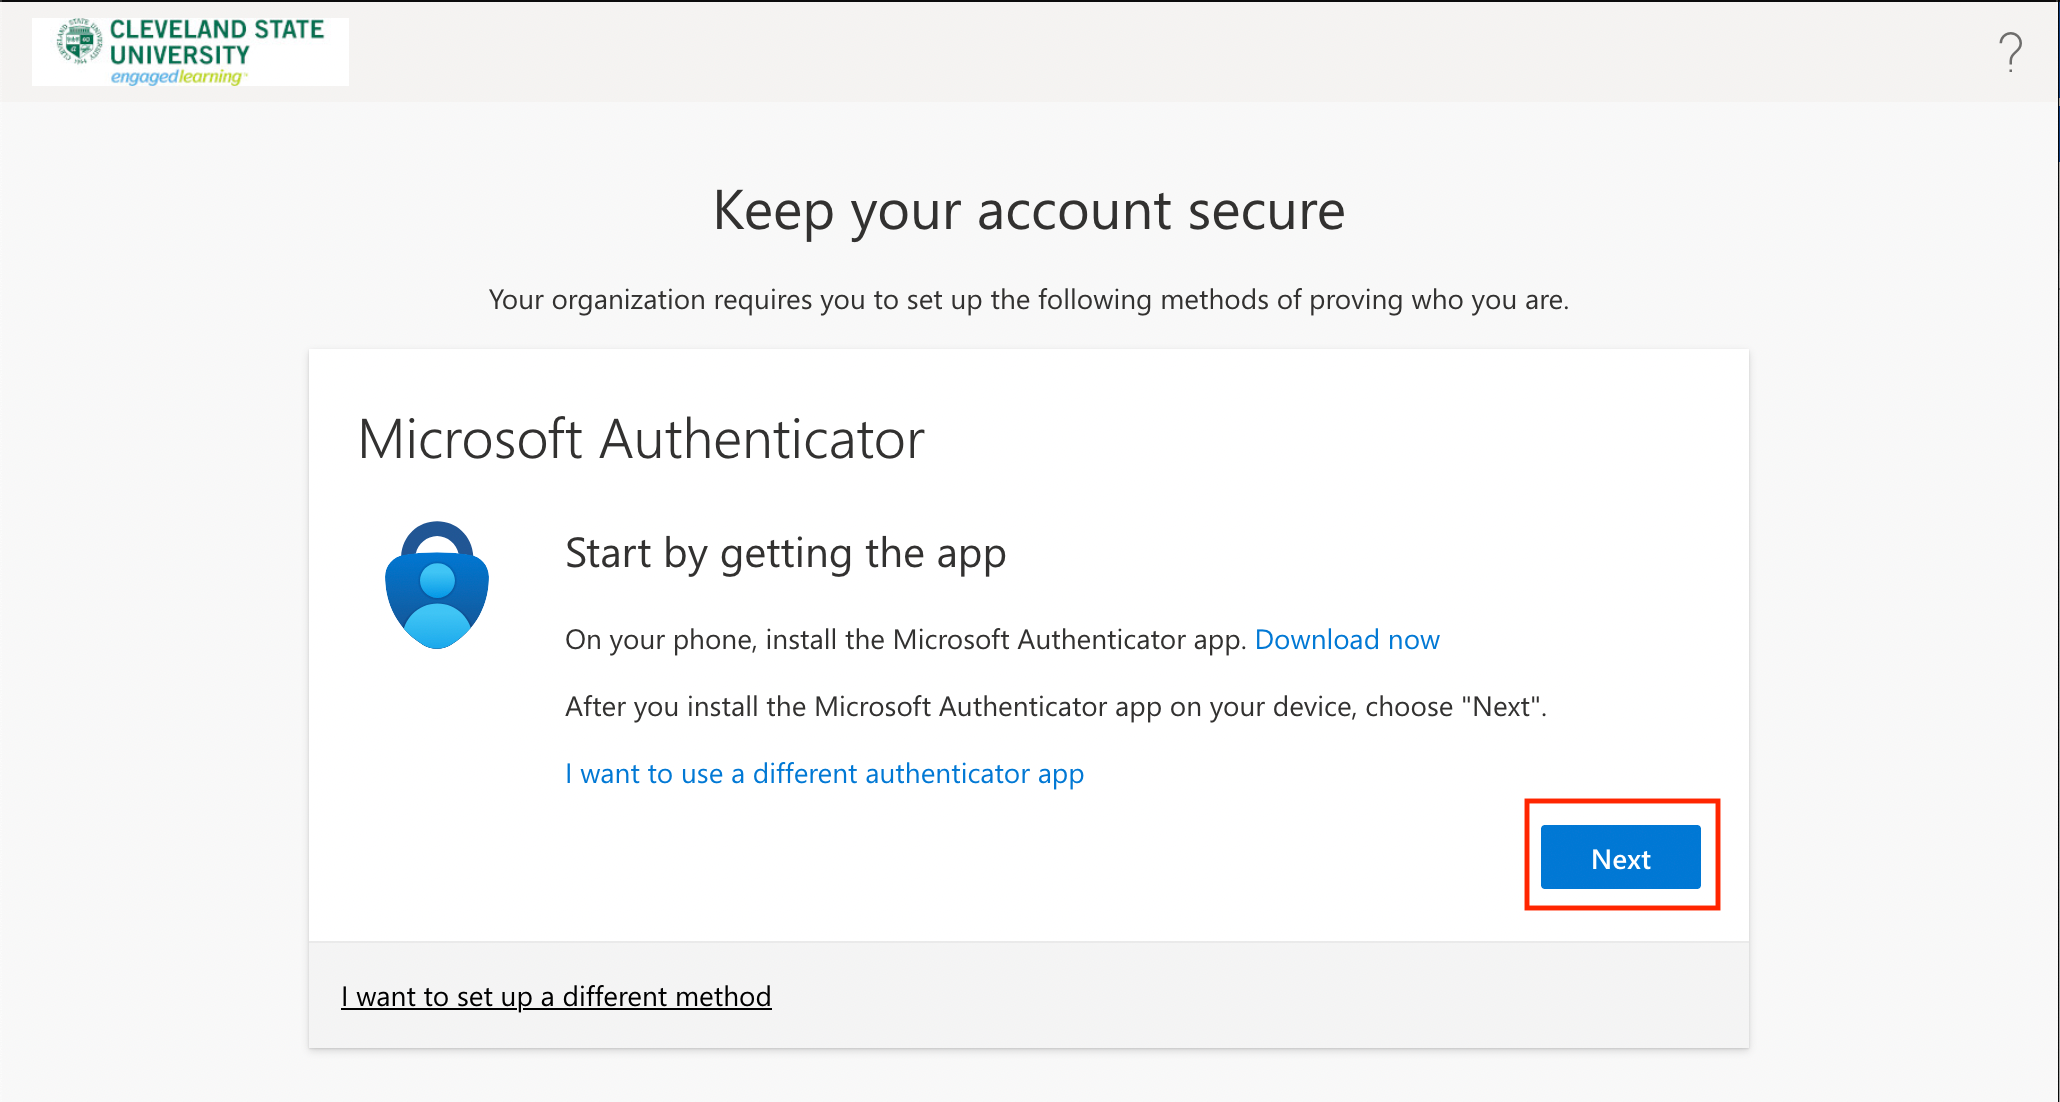
- Click Next, then Next:
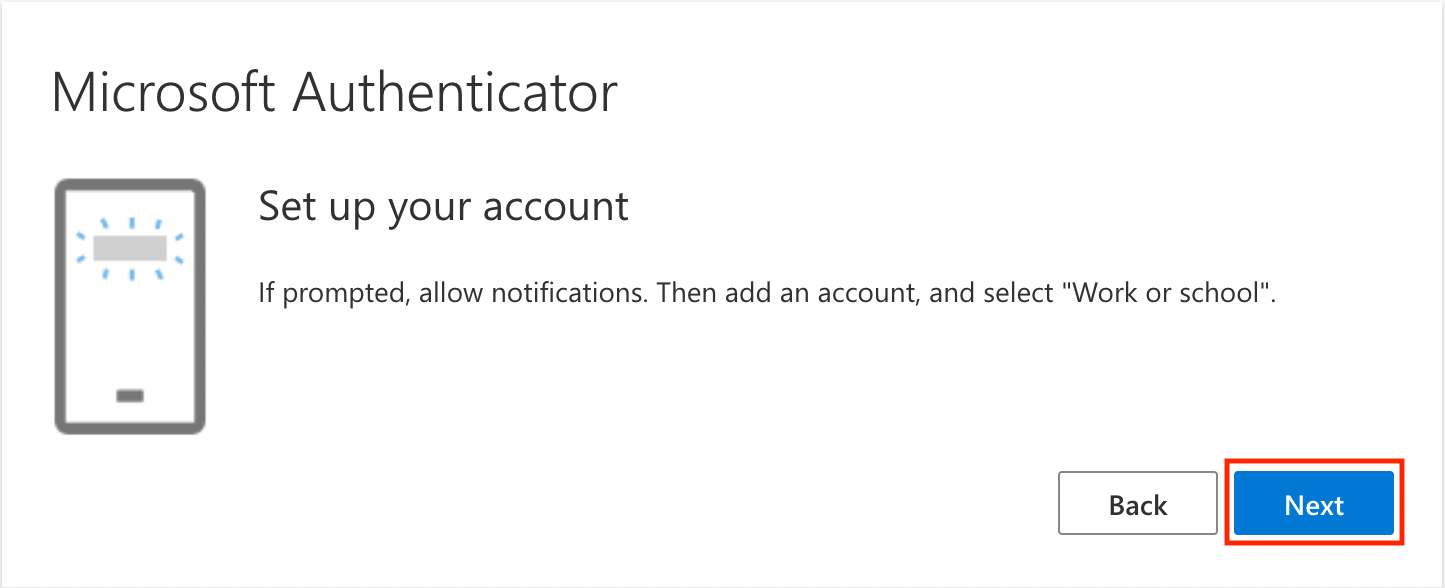
- On your phone or tablet, launch Microsoft Authenticator. Tap I agree, then tap Scan a QR code:
If you already have accounts in Microsoft Authenticator, you can add your CSU account by opening the menu in the top right corner of the app and then tapping Add account (Android) or tap the Add button (+) in the top right corner of the app (iOS). Afterward, tap Work or School Account, then Scan QR Code: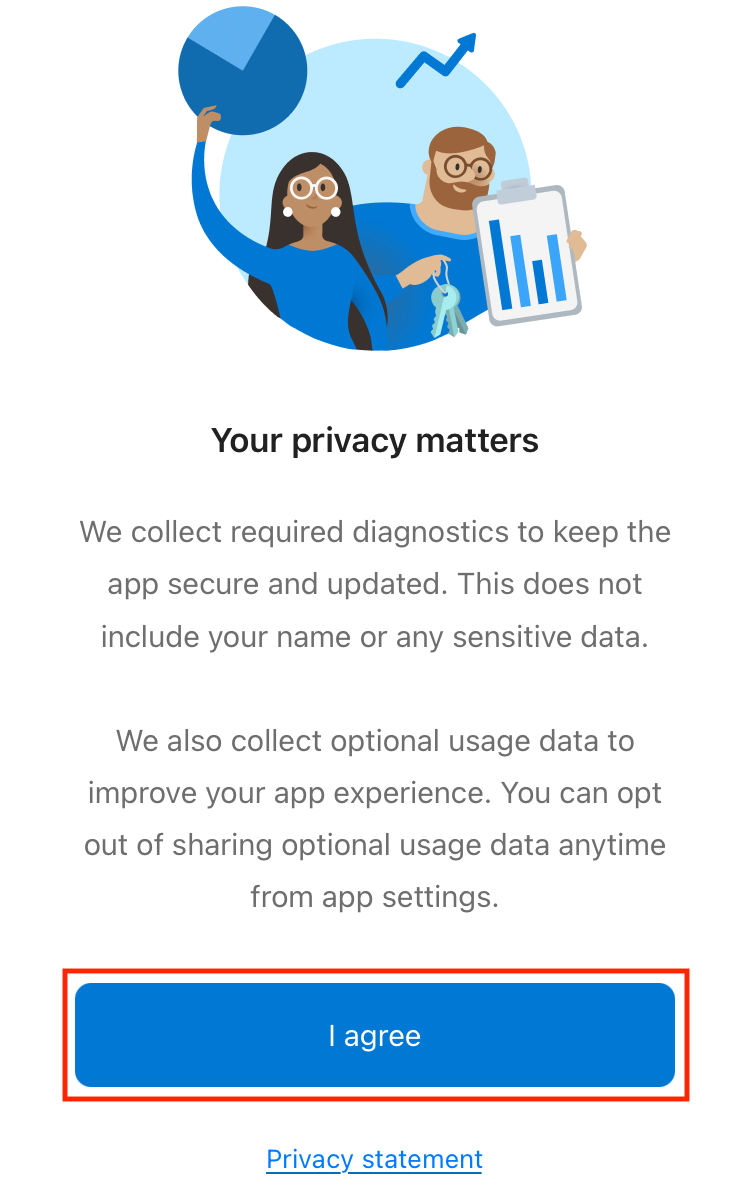

Android iOS 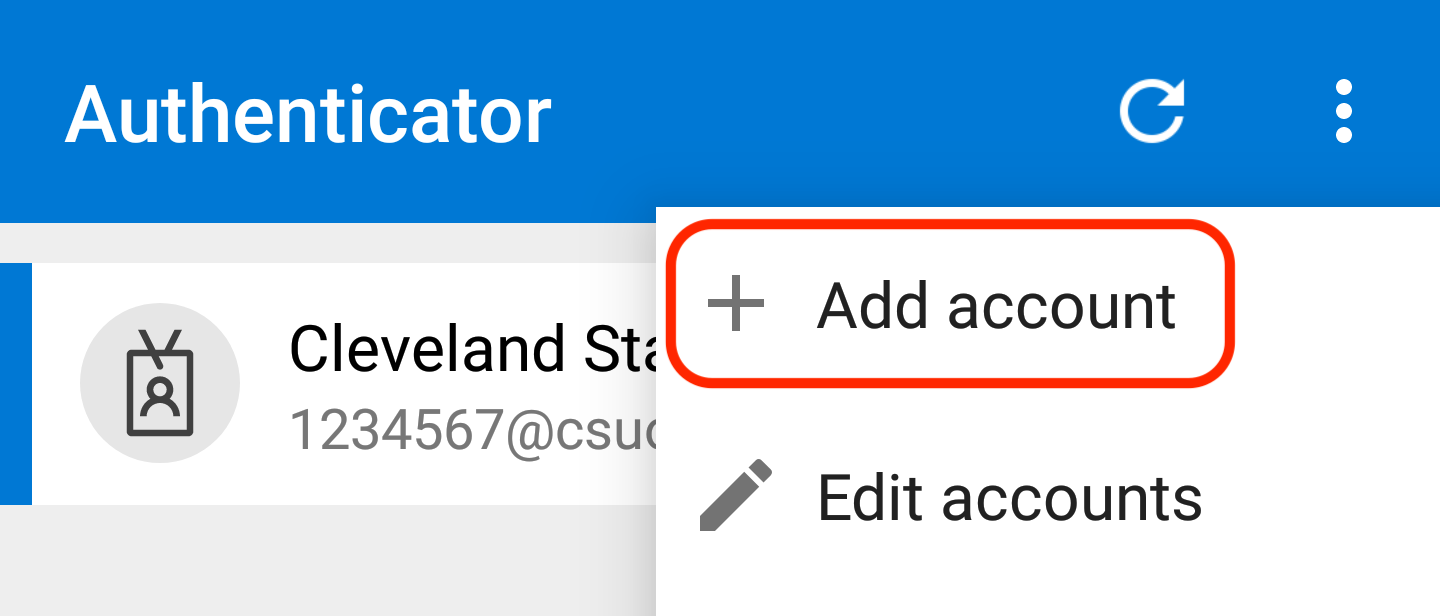

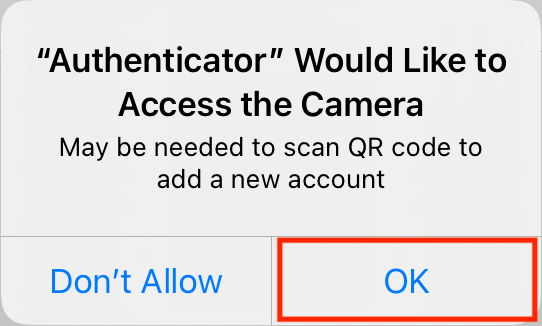
- The app will now prompt for access to your device's camera to scan the QR code. Tap Allow (Android) or OK (iOS):
Android iOS 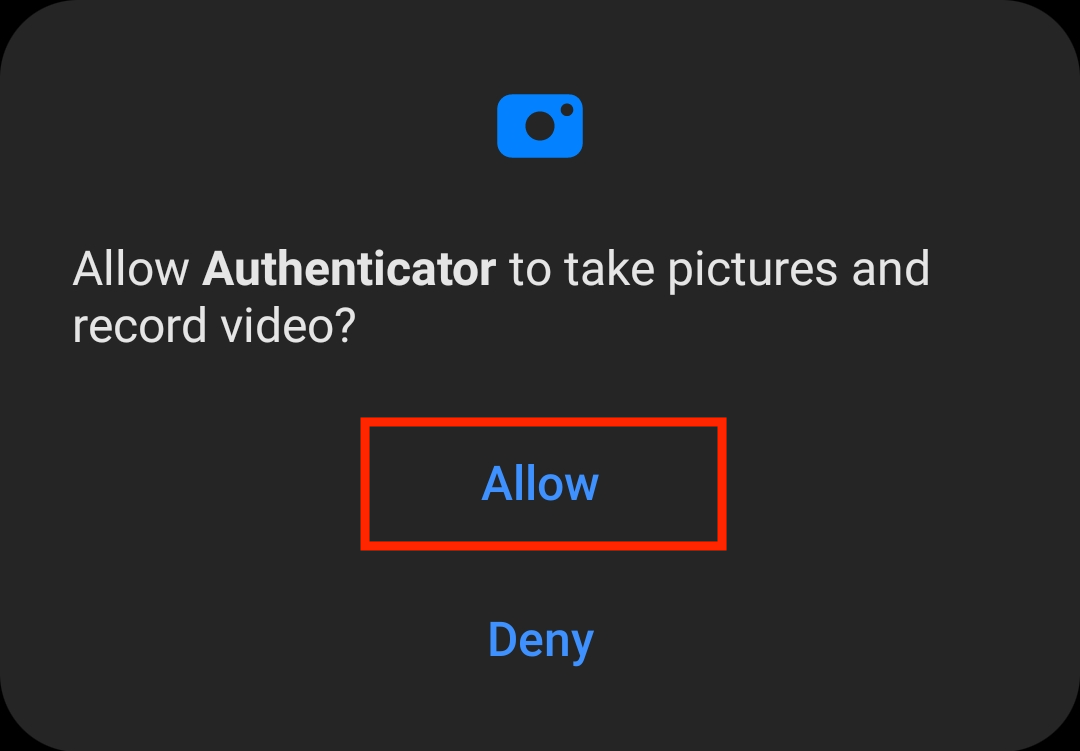
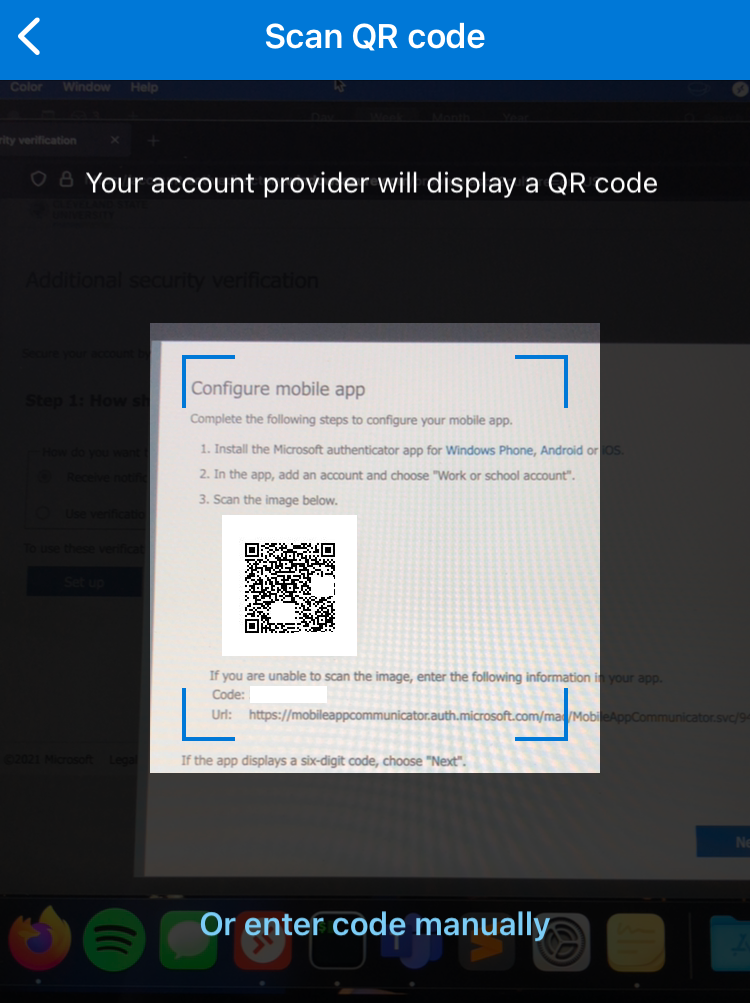
- Point your device's camera at the QR code displayed on your screen. Note: the QR code displayed here will only work from within the Microsoft Authenticator app; do not use your device's camera app to scan this code.
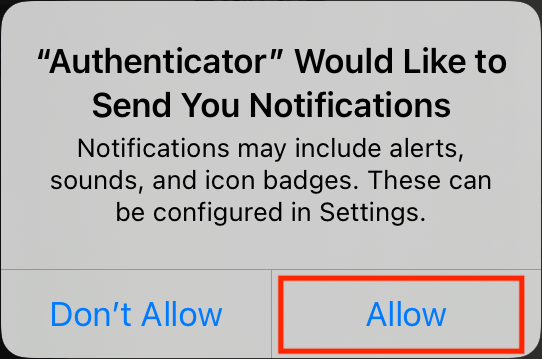
- After the code is scanned, Microsoft Authenticator will prompt you for permission to send notifications. Make sure you tap Allow (iOS only):
- Once the code has been scanned, click Next on your computer:
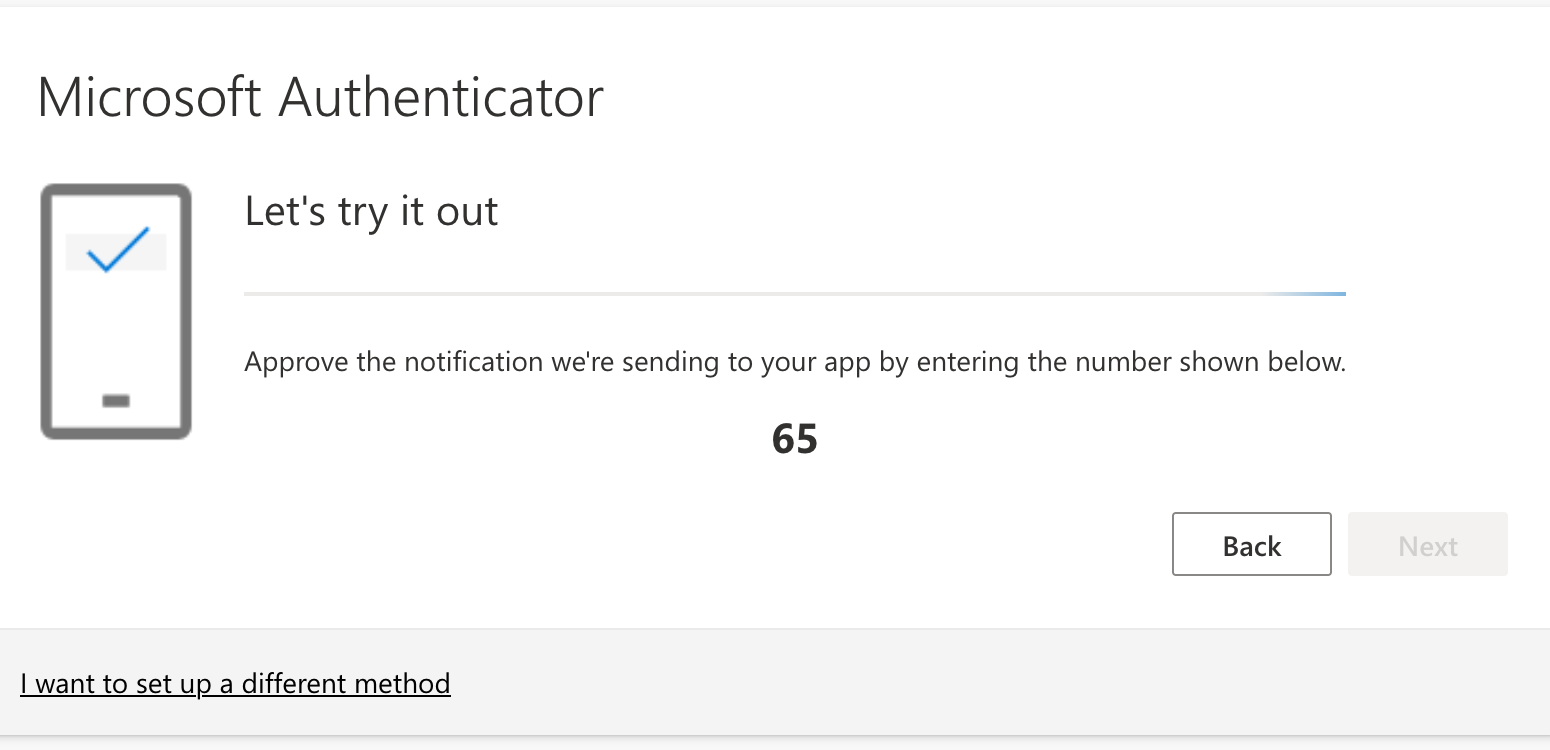
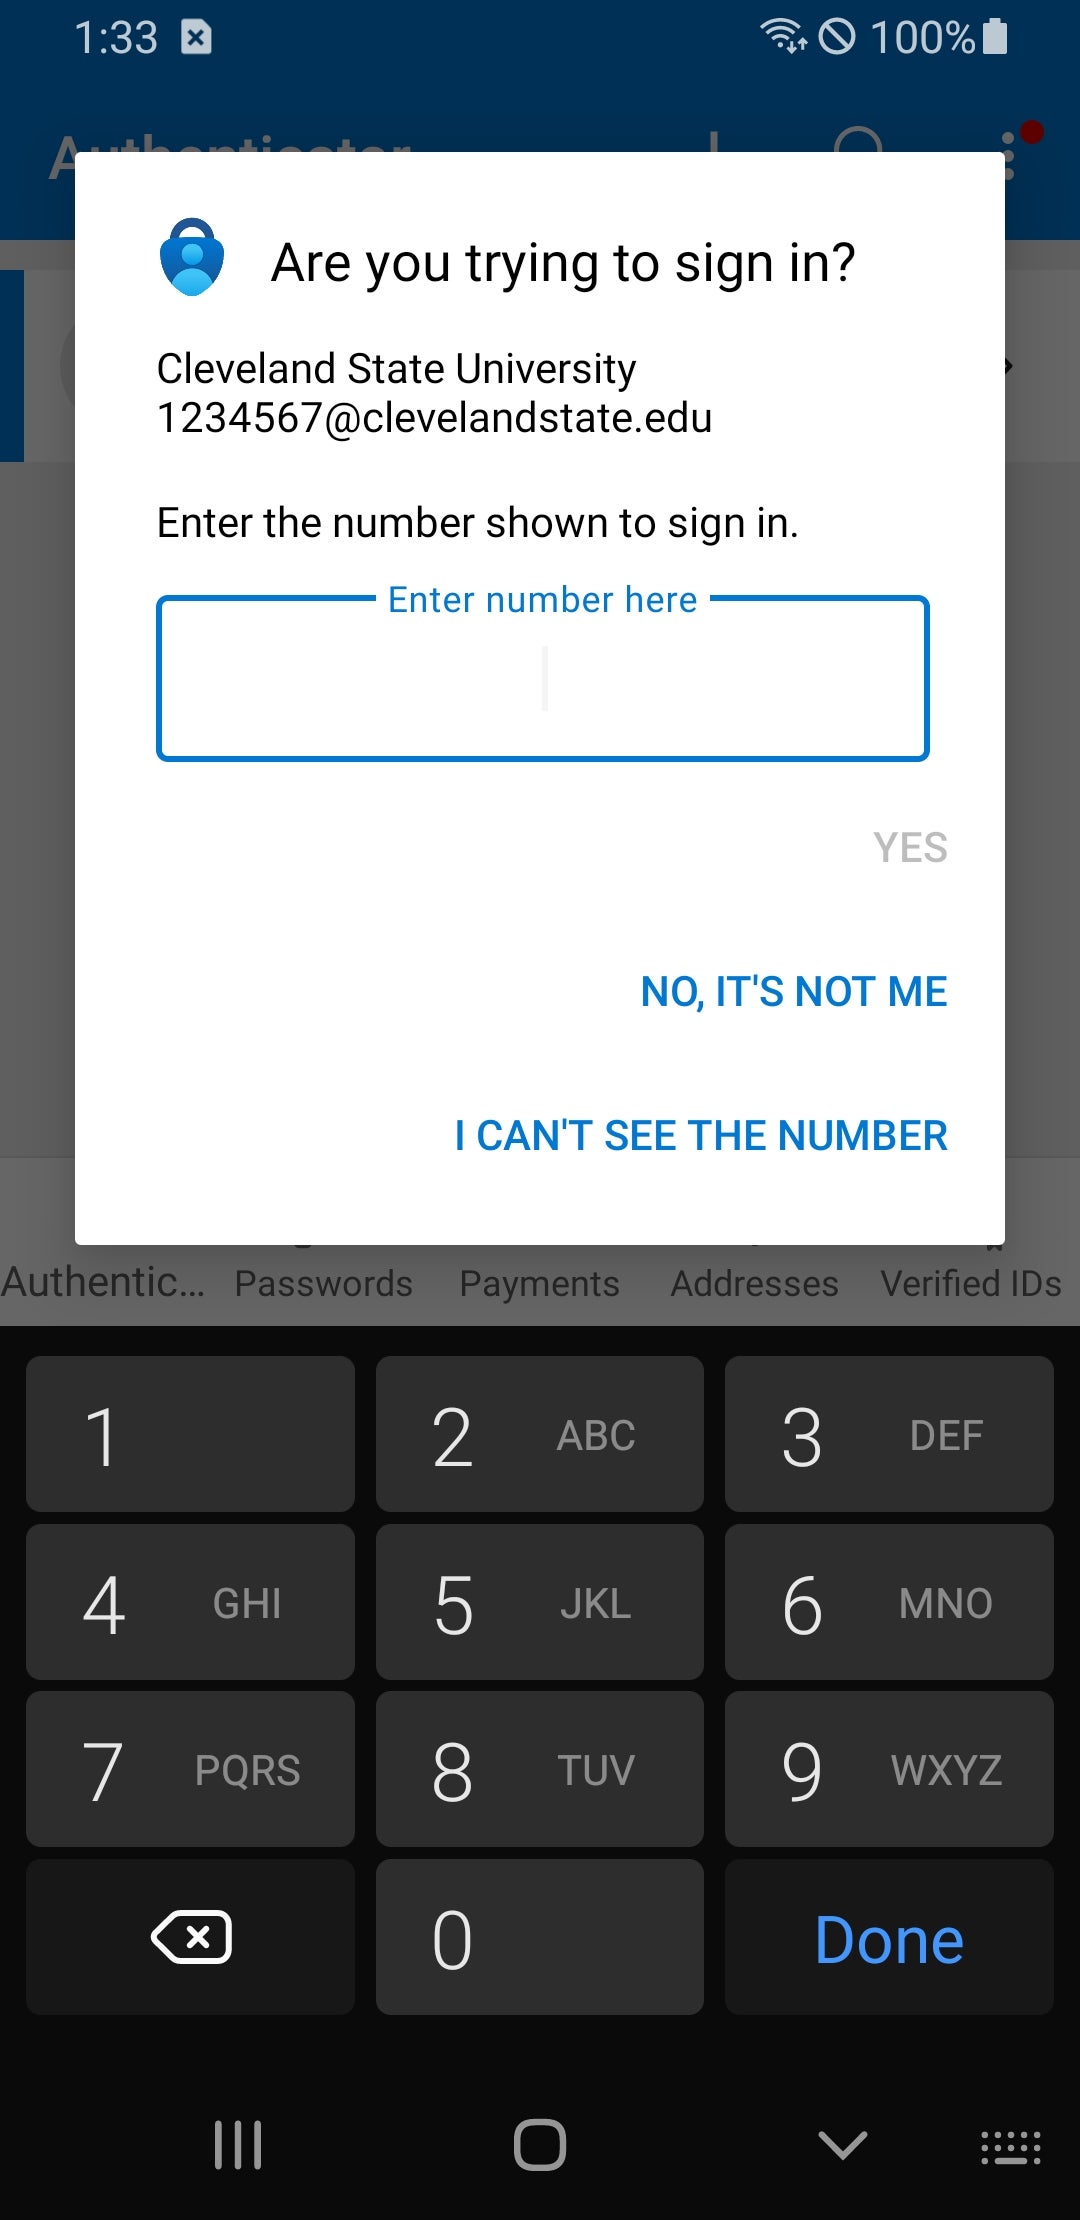
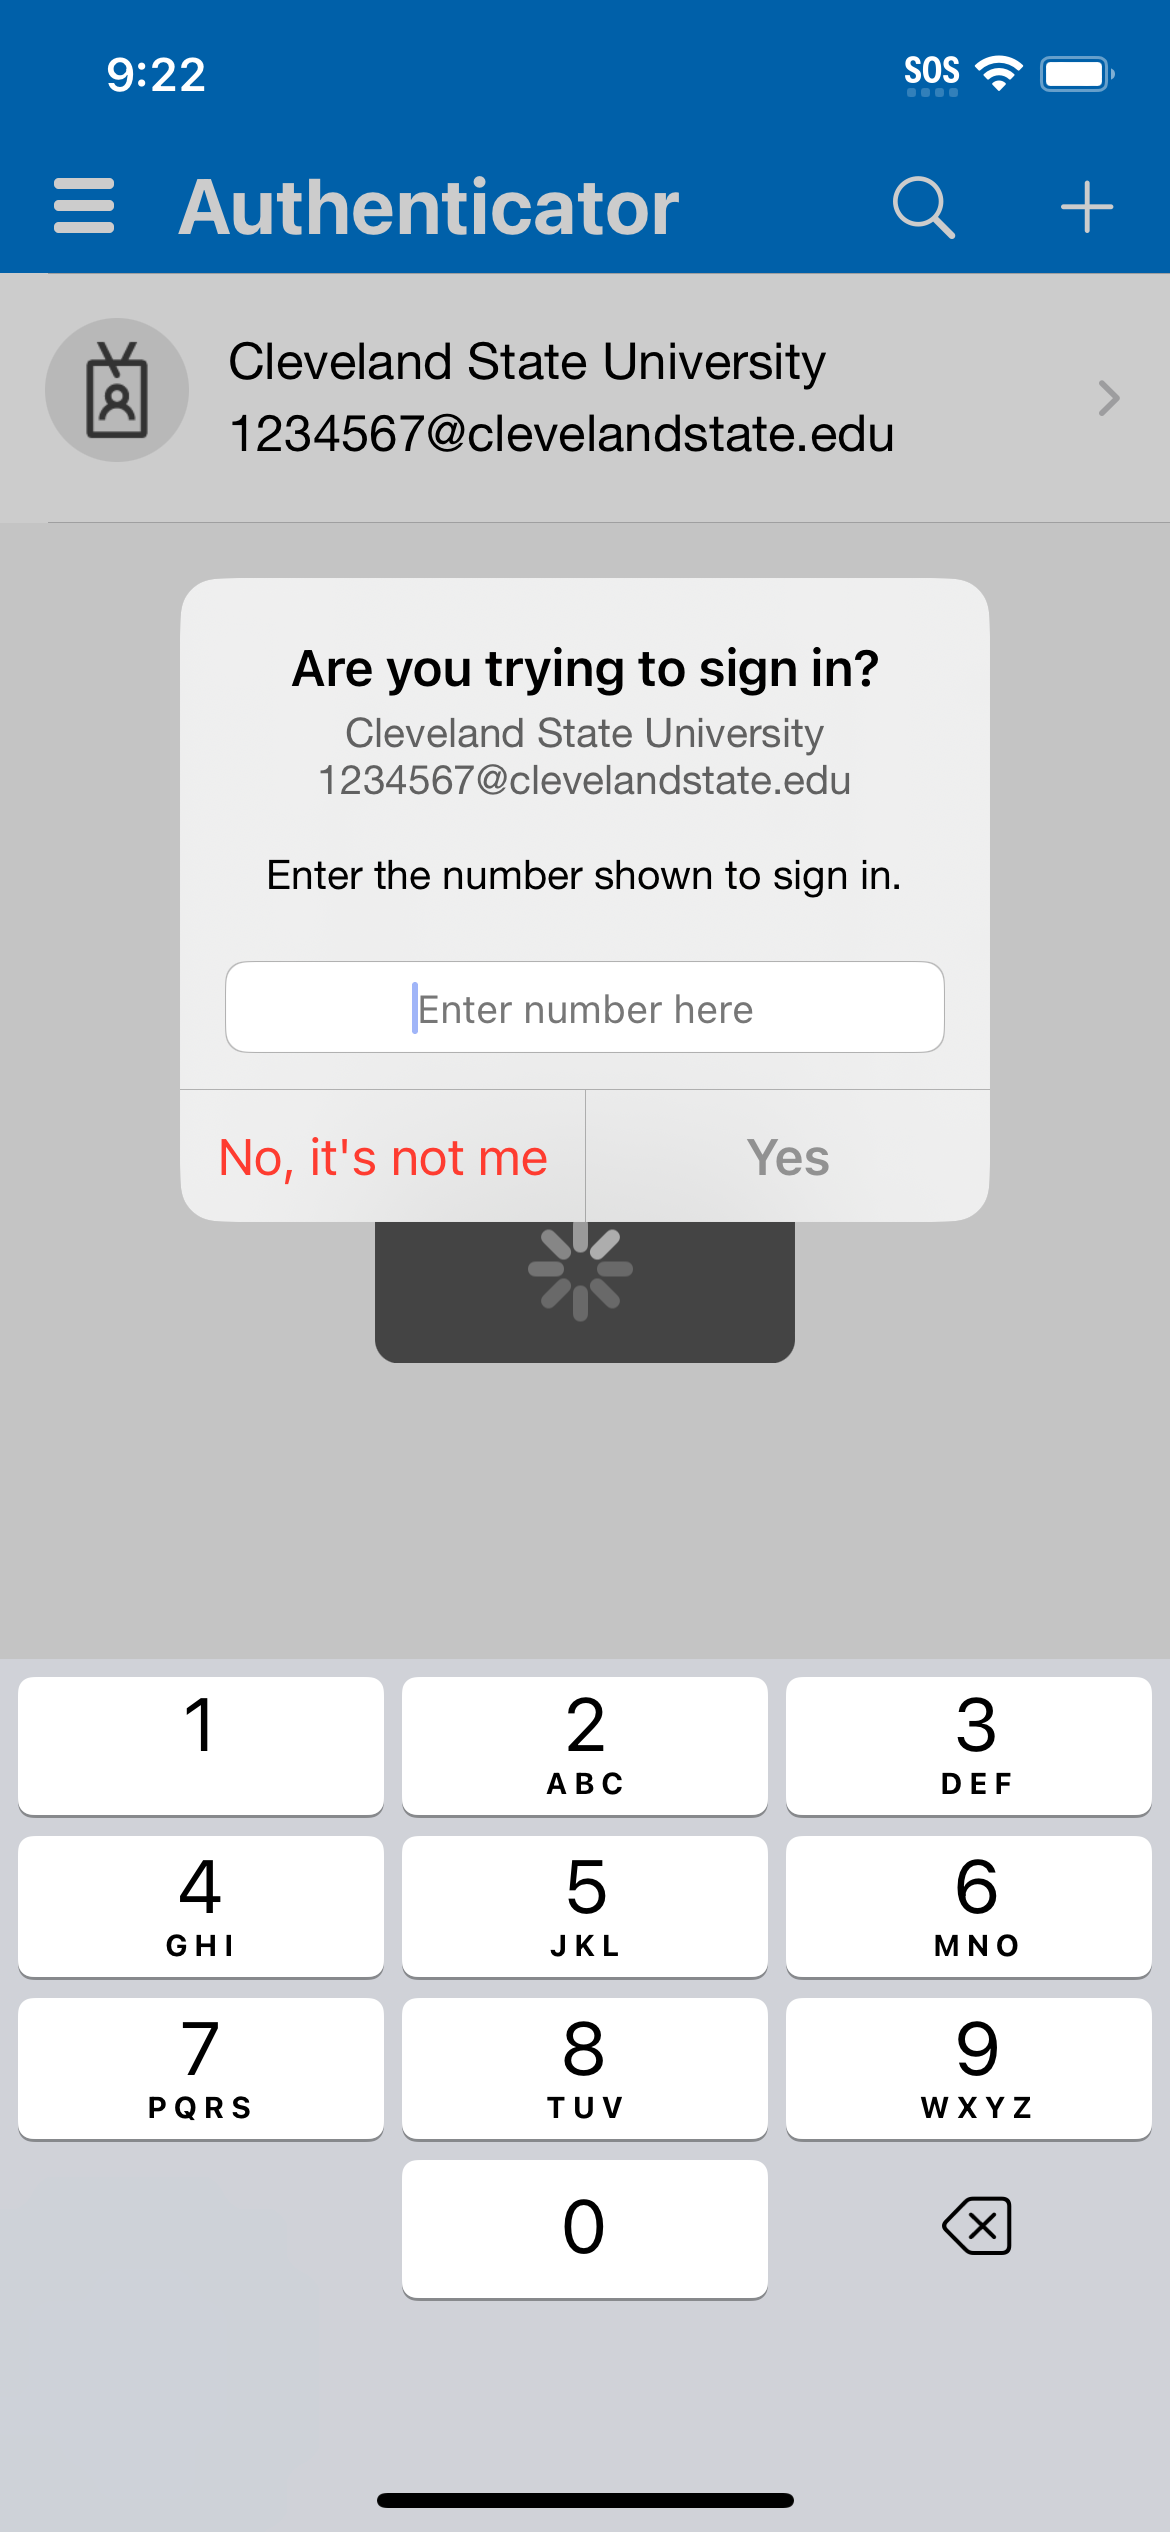
- Respond to the push notification on your device by tapping Approve and then typing in the number you see on your computer screen:
Android iOS 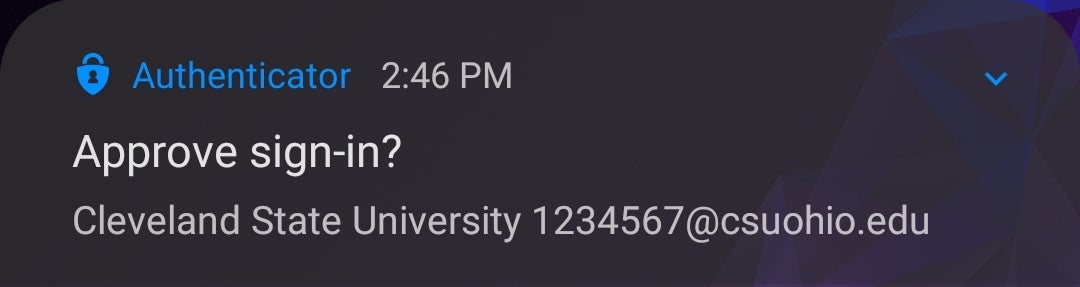

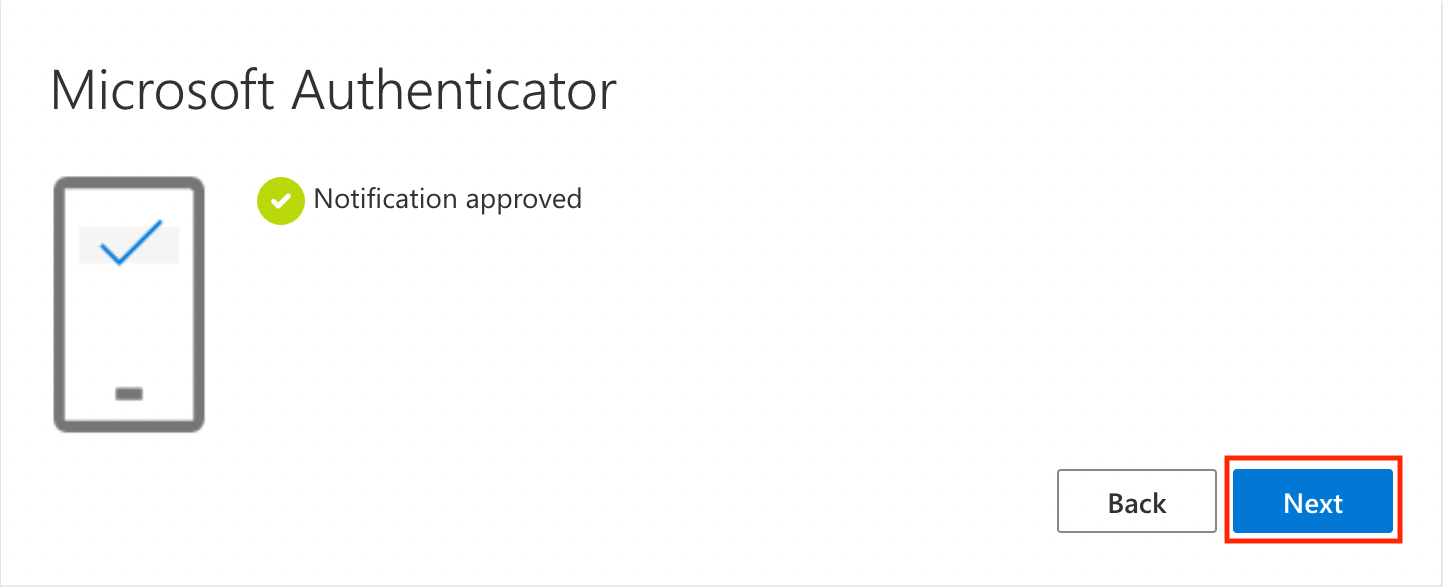
- After successfully enrolling the Microsoft Authenticator app, click Next, then done:
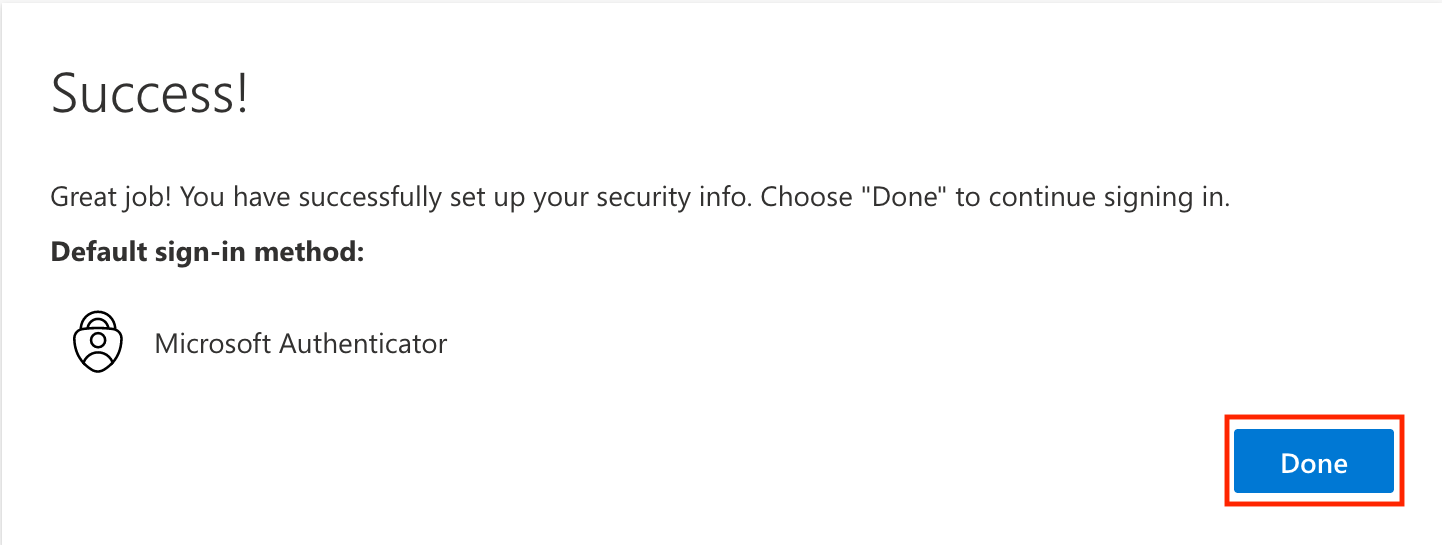
- You'll now be taken to the Security Info page, where you can provide a mobile phone number in the event you lose access to the app. Microsoft can call or text this recovery phone number during sign-in if you aren't able to respond to the push notification.
Note: do not use a CSU office phone for this recovery method.
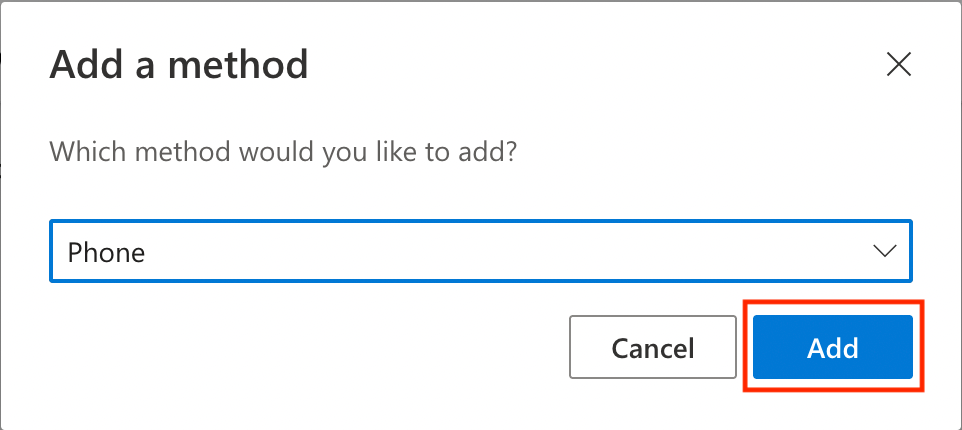
Click Add method, then select Phone from the dropdown list and click Add.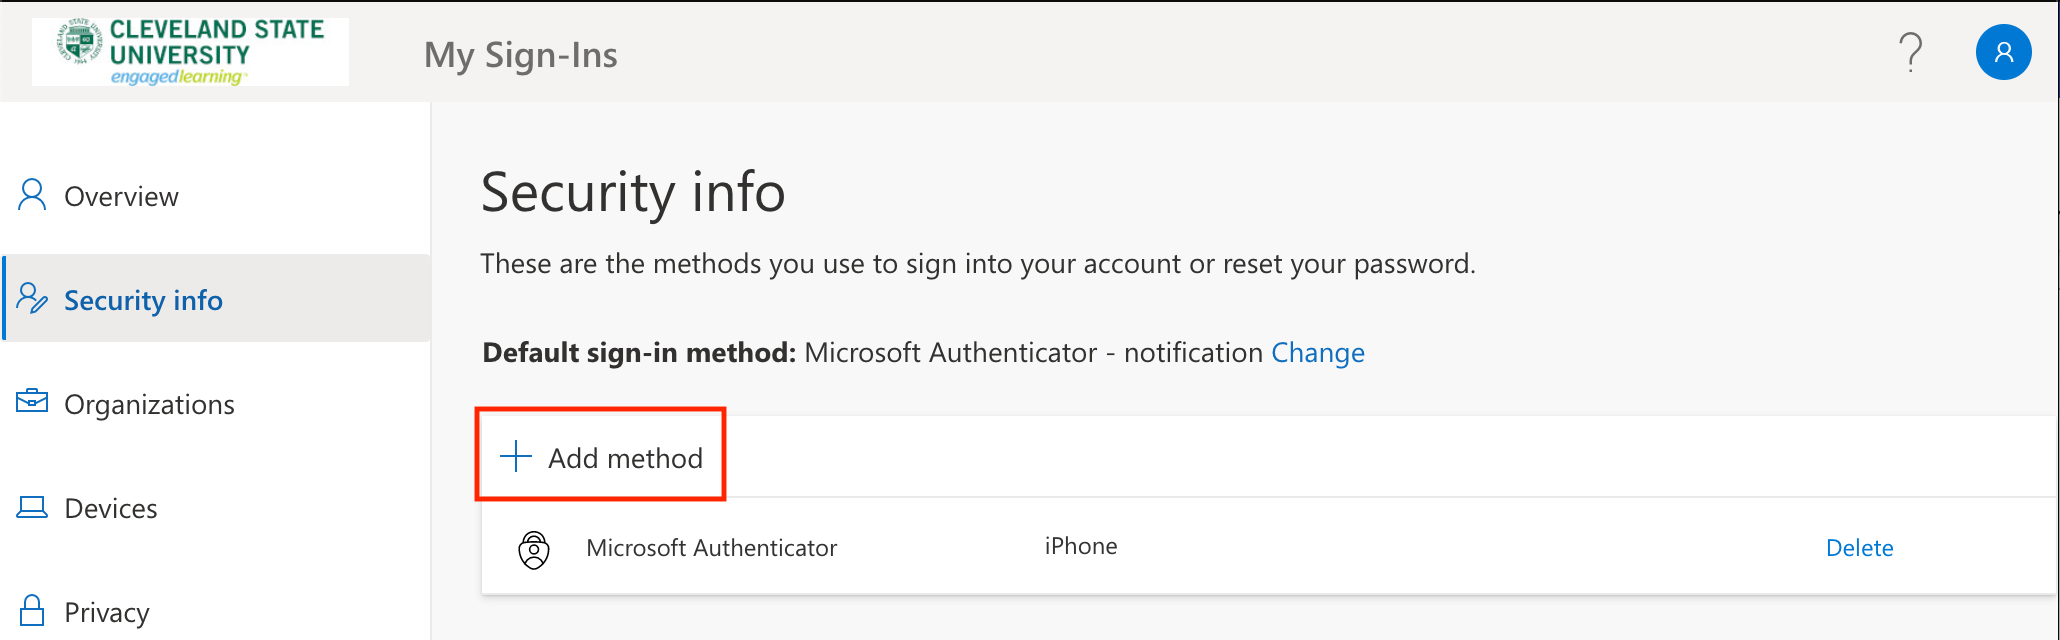
- Enter your mobile phone number, then click Next:
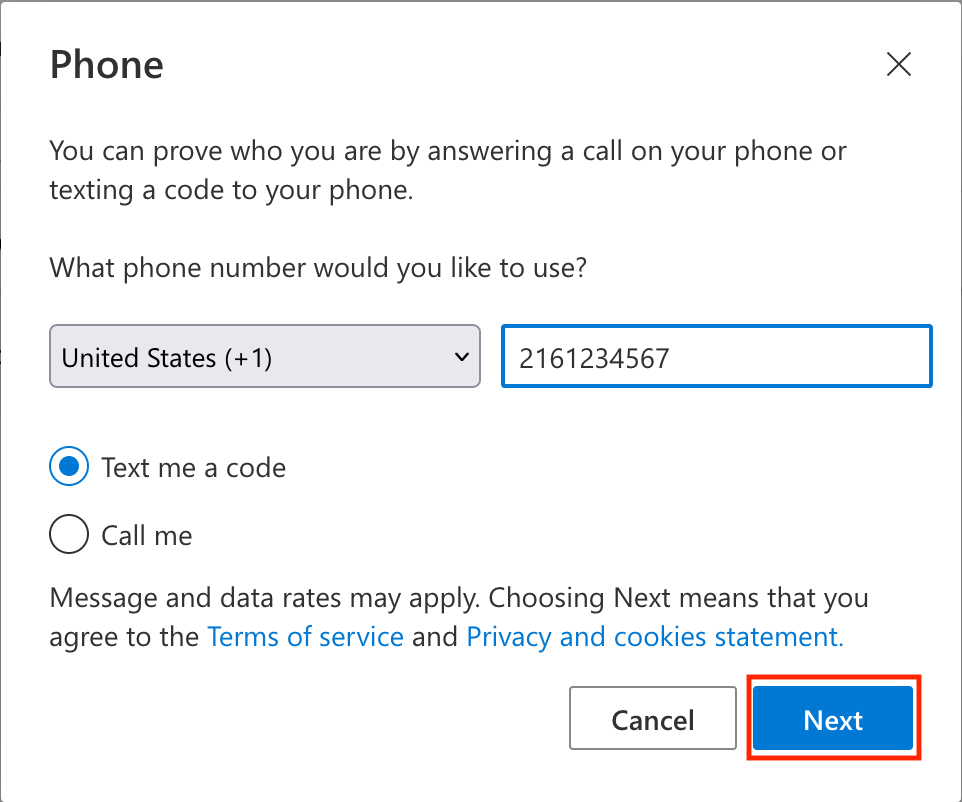
- Enter the code sent to your phone, then click Next, then click Done.
- That's it! You're now enrolled for multifactor authentication via the Microsoft Authenticator app. Once MFA is enforced for your account, you will be prompted for any sign-ins to CSU resources you initiate off-campus. To edit your MFA settings, please return to http://mfasetup.csuohio.edu at any time.
Security
security@csuohio.edu