Technical Training
Mailing Address
Cleveland State University
2121 Euclid Ave.
Rhodes Tower 1104N
Cleveland, Oh 44115
Training Computer Lab
Rhodes Tower
4th Floor Rm 414
Enter through Michael Schwartz Library
Upload files
Step by step procedure
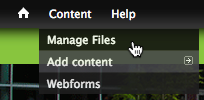
- After logging into the system, roll the mouse over the Content menu
- Click on the Manage Files menu item
- The Manage Files area opens but displays every file for all the University pages. You can force it to display your group's images by selecting your group membership name from the Select a group drop down menu
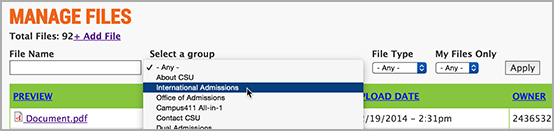
- Click on the + Add File link

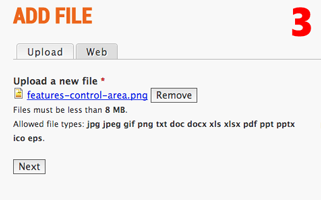
In the Add File area, do the following
- Click the Choose File button - brings up the standard navigation window allowing you to find your file
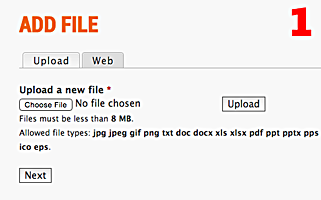
- Click the Upload button - brings the file into the system in order to be uploaded
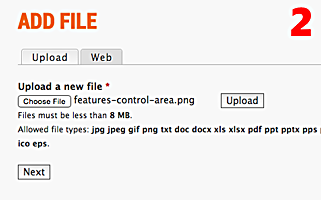
- Click the Next button to complete the file upload
Mailing Address
Cleveland State University
2121 Euclid Ave.
Rhodes Tower 1104N
Cleveland, Oh 44115
Training Computer Lab
Rhodes Tower
4th Floor Rm 414
Enter through Michael Schwartz Library