Student Success Programs
Campus Location & Mailing Address
Campus Location
1899 East 22nd Street, BH110
Cleveland, Ohio 44115-2214
Phone: 216-687-5391
Email: starfishsupport@csuohio.edu
Mailing Address
Enrollment Management
Cleveland State University
2121 Euclid Avenue, BH110
Cleveland, Ohio 44115-2214
Starfish & Zoom

Faculty, staff and students are able to use Zoom to conduct meetings using video conferencing, over the phone or both. You can learn more about Zoom at Cleveland State University.
You can setup your Zoom appointments a variety of ways (Recurring Meetings, Single Meeting, Personal Meeting Room, etc.). Instructions on how to use Zoom in Starfish are found below. You can either review these materials by scrolling down this page or you can use the Quick links below to quickly navigate between sections.
Quick links
- Find and Configuring your Zoom Meeting Room
- Find your Zoom Meeting Details to share with students
- Add your Zoom Meeting Room as an Office Hour Location in Starfish
- Update your Office Hours to include your Zoom location
- Document a Starfish Note after your appointment
Find and Configure your Zoom Meeting Room:
Zoom gives you various options for configuring meetings. You can setup recurring meetings, webinars, etc. For this example, we will be configuring your Personal Meeting Room, which is a virtual meeting room that is permanently reserved for you and the Zoom Meeting ID and link always stay the same.
*It is very important that you use your Personal Meeting Room details for your office hour location. Since the Meeting ID and link remain the same, you will not have to constantly update this office hour location with new Zoom details.
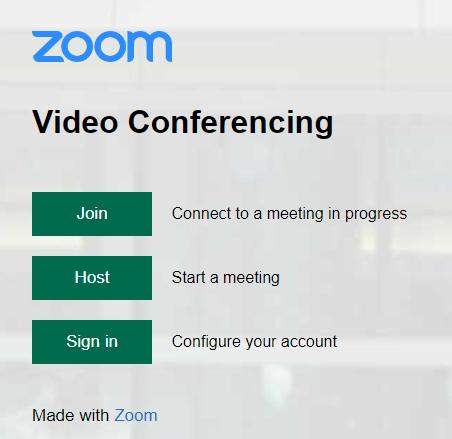
1. Go to: https://csuohio.zoom.us/.
2. Select Sign in.
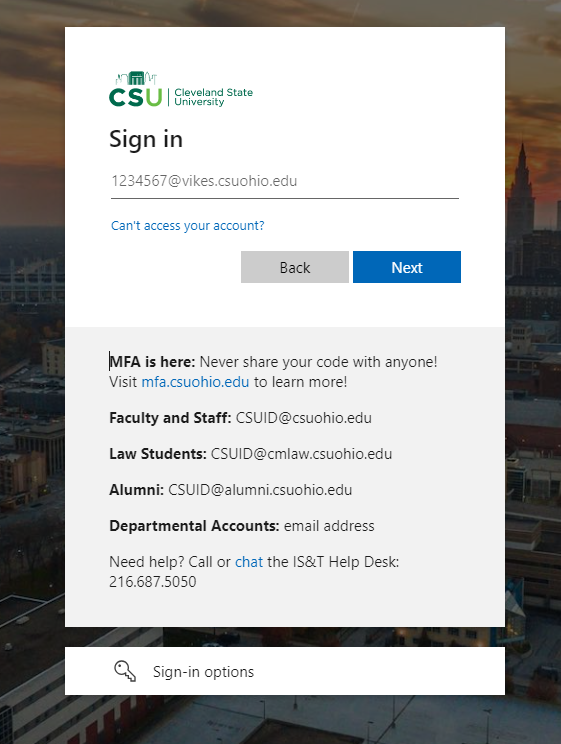
3. Log in using your CSU single-sign on (SSO) account information. Your username is your CSUID@csuohio.edu (example 1234567@csuohio.edu).
4. Select Meetings in the left-side menu.
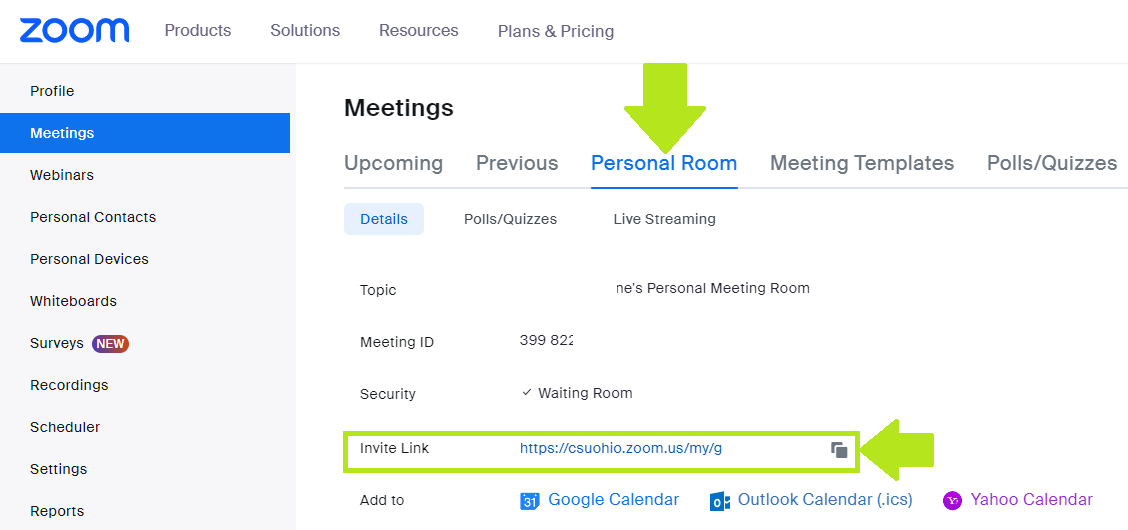
5. Select Personal Room. The information on this screen shows your Personal Zoom Room Meeting ID and Invite Link.
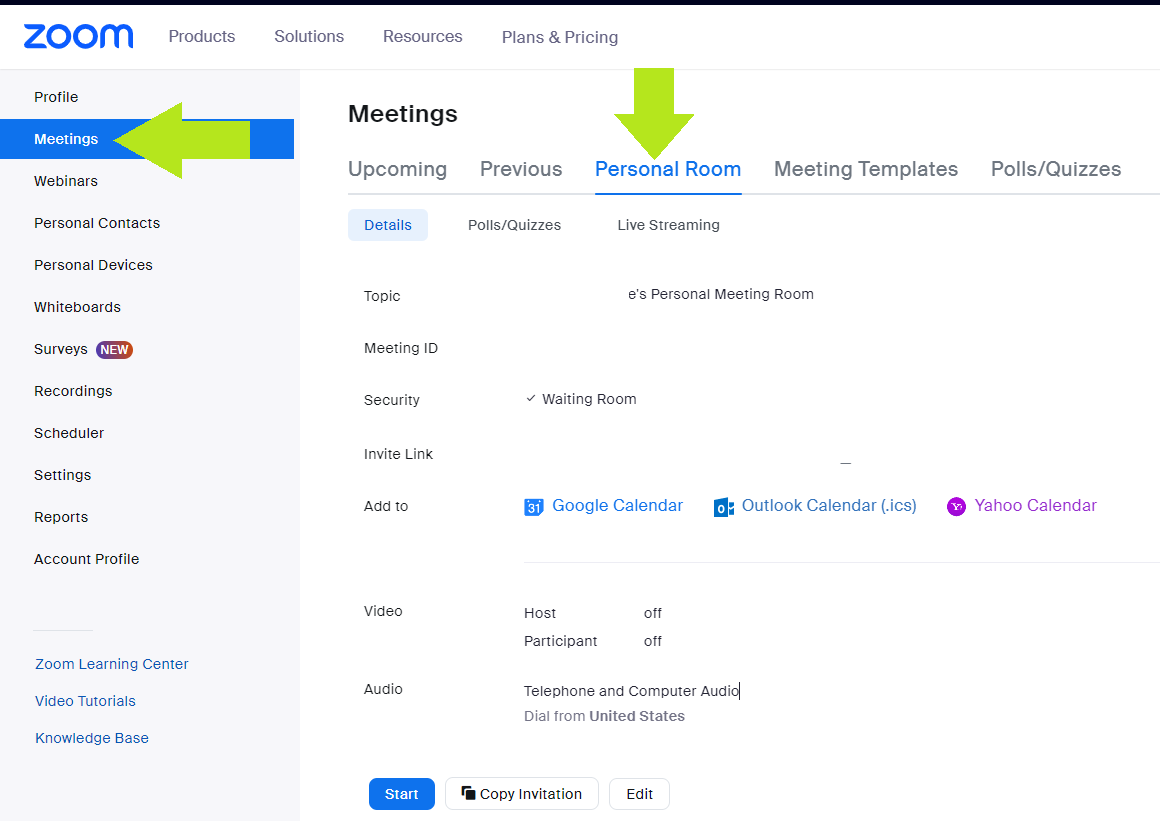
6. Select Edit at the bottom of your Personal Room details. Here you are able to adjust settings for your Personal Zoom Room - such as adding a required Passcode to join, enabling a Waiting Room, requiring authentication to join, and options to require Video and Audio when joining.
- *For Starfish Office Hour set-up:
- Make sure the Passcode is unchecked/disabled!
- Make sure the Waiting Room is checked/enabled. This allows you to choose which person(s) you would like to allow into your meeting and also prevents a new student from joining in your present meeting if you have back-to-back appointments.
- Video should be enabled on for both host and participant.
- Audio should be set to Both.
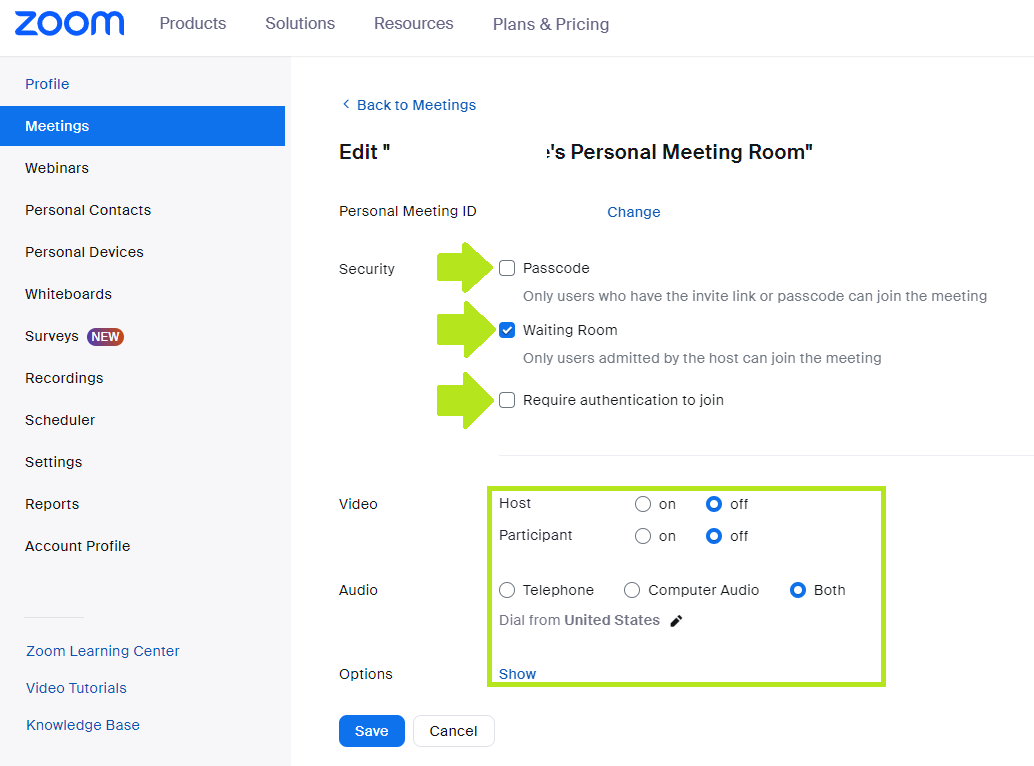
7. Select Save when you are done editing your Personal Meeting Room settings.
Find your Zoom Meeting Details to share with students:
Now that you've set-up your Personal Zoom Room to support student appointments, you can start sharing your Meeting ID and Invite Link.
1. In your CSU Zoom account, go to the Personal Room.
2. Copy the Invite Link by clicking the square-icon next to the link. You can also copy the Meeting ID, if needed. Paste where needed.
Add your Zoom Meeting Room as an Office Hour Location in Starfish:
1. Log in to Starfish.
2. Select the Menu options button, the three-lined icon at the top-left of your screen.
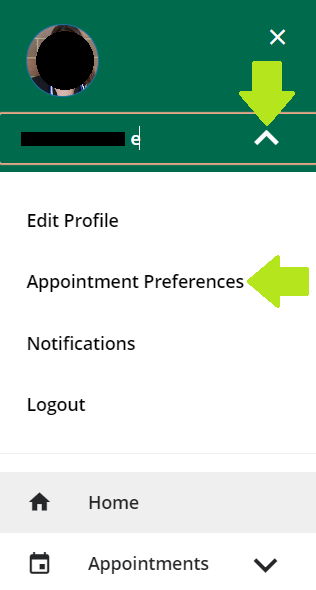
3. Select the drop-down arrow next to your name. Select Appointment Preferences.
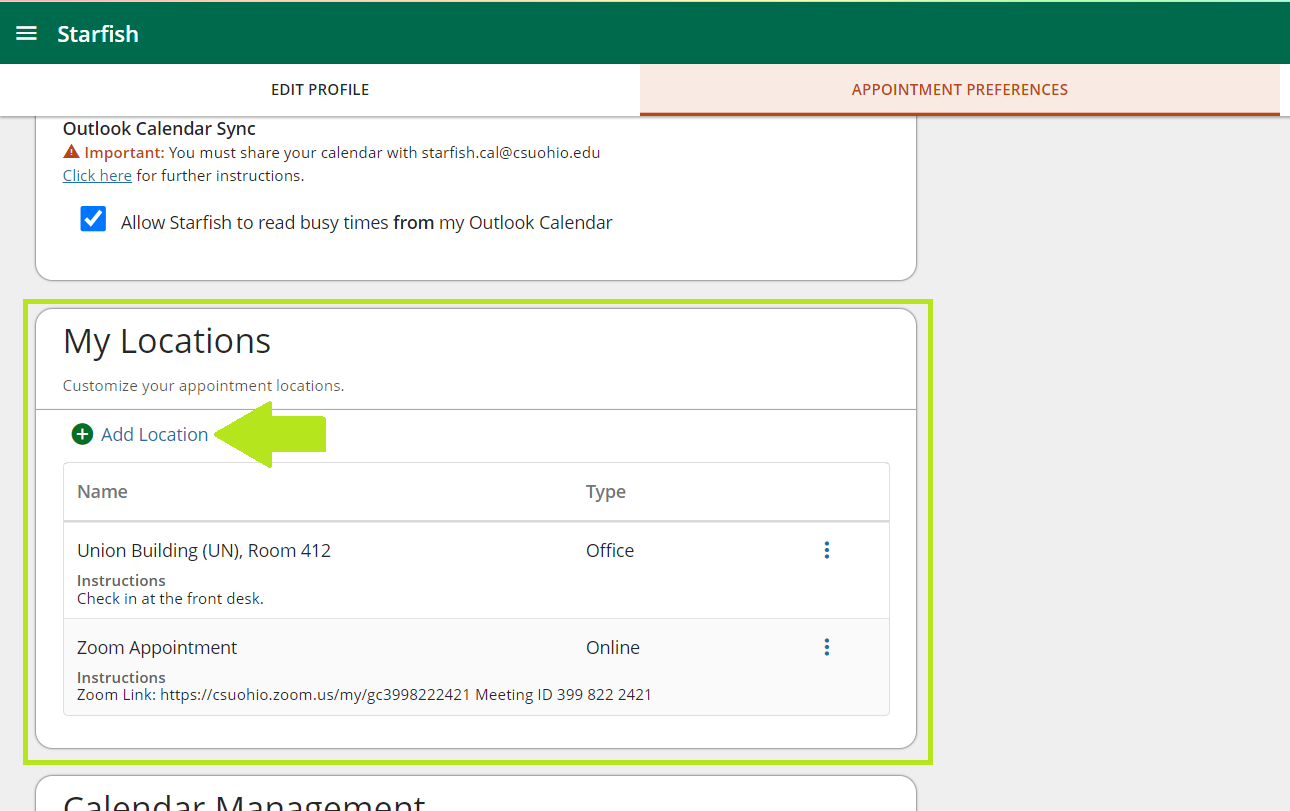
4. Scroll down to My Locations. Select + Add Location. You can edit a saved location, by clicking the 3-dot icon next to an existing location. Updating an existing location will update all of the existing office hours that are using that location.
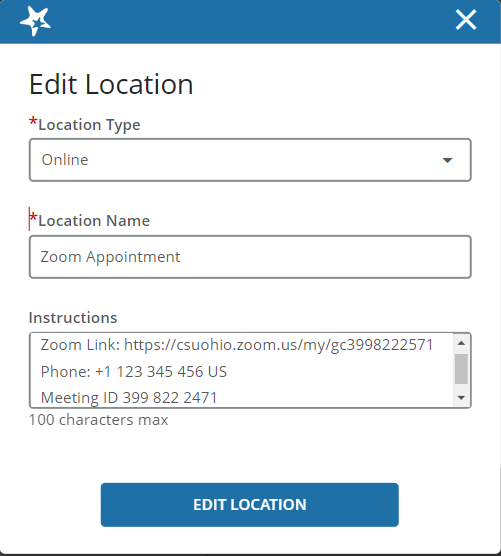
5. Set the Location Type to Online.
6. Enter a Location Name, like Zoom Phone/Video Meeting Room. It is recommended that if you only are using Zoom to host phone appointments, then change the name to only include Phone vs. Phone/Video.
7. In the Instructions section, paste in your Zoom Personal Meeting Room invite link, Phone Number and Meeting ID. NOTE: There is a 100-character limit in this text box. We recommend using the following format: Zoom Link: https://csuohio.zoom/us/j/1283123123123; Phone:+1 123 345 456 US; Meeting ID:123 345 678
8. Click Edit Location when done. Then, select Save in the bottom-right of your Appointment Preferences page.
Update your Office Hours to include your Zoom location:
If you would like to update existing Office Hours to include your new Zoom location, complete these steps:
1. Login to Starfish.
2. Select the Menu options button, the three-lined icon at the top-left of your screen.
3. Select Appointments.
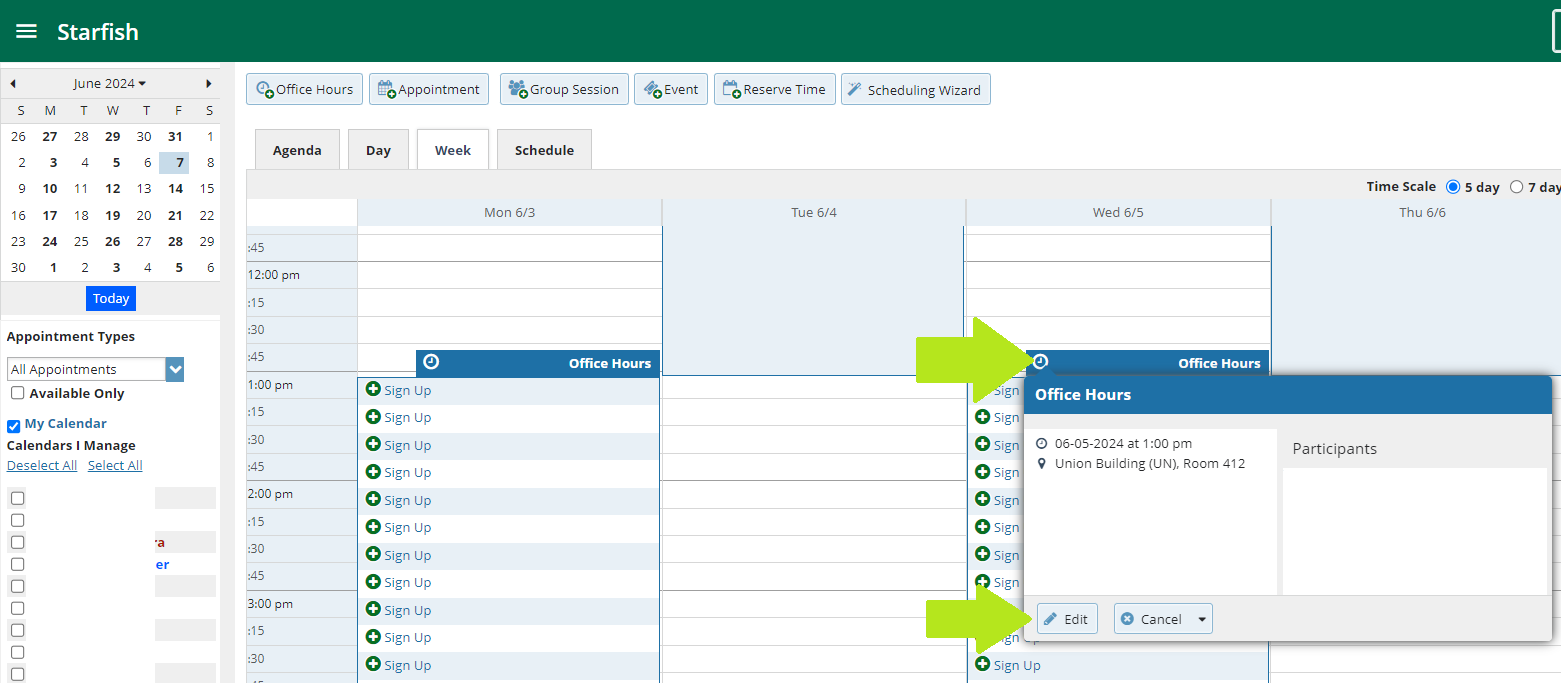
4. Locate the Office Hours timeblock you would like to update.
5. Hover over the calendar icon to bring up a dialog box
6. Select Edit.
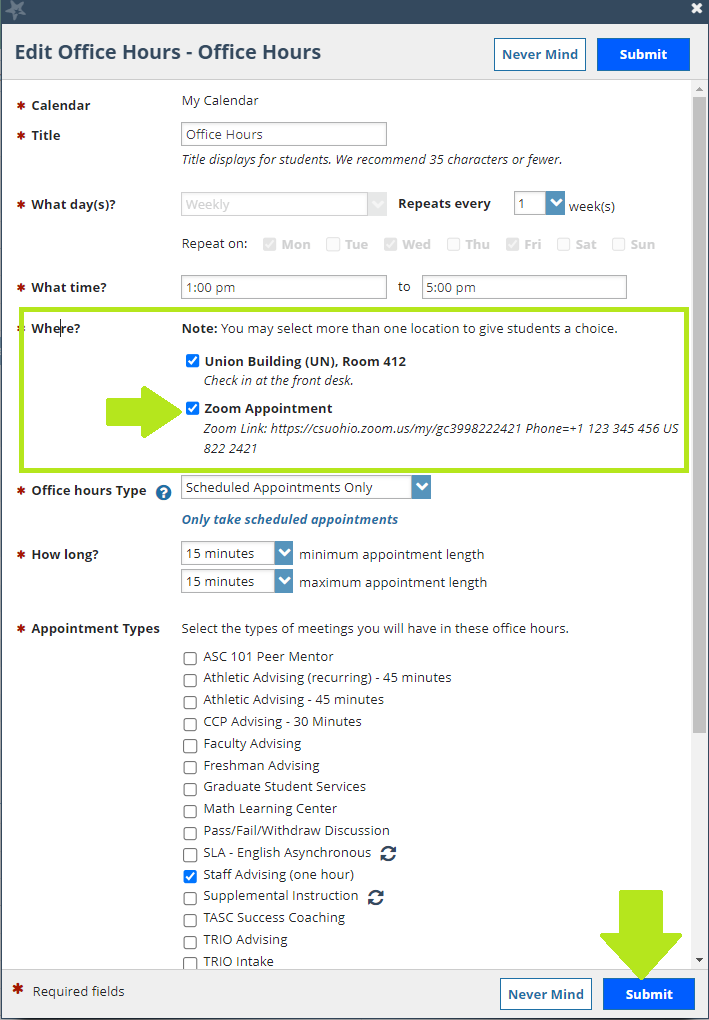
7. In the new dialog box that opens, under Where, select your newly added Zoom location.
8. Click Submit.
Document a Starfish Note after your appointment:
Don't forget to return to Starfish to add relevant meeting notes! Check out our webpage for instructions on how to do this.
*Please feel free to contact us if you have any questions: StarfishSupport@csuohio.edu.
Campus Location & Mailing Address
Campus Location
1899 East 22nd Street, BH110
Cleveland, Ohio 44115-2214
Phone: 216-687-5391
Email: starfishsupport@csuohio.edu
Mailing Address
Enrollment Management
Cleveland State University
2121 Euclid Avenue, BH110
Cleveland, Ohio 44115-2214